The Export Recovery Point dialog opens.
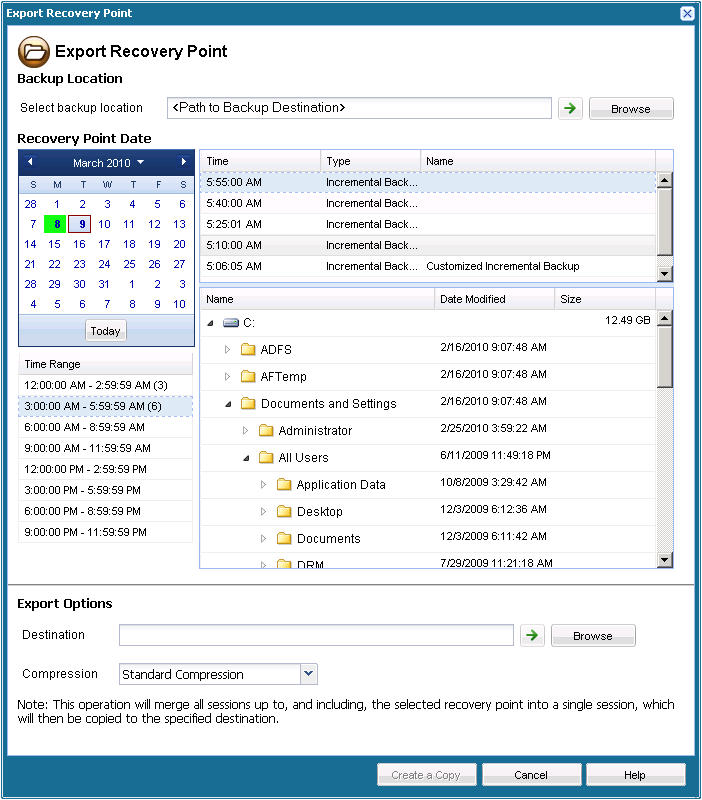
The calendar view will highlight (in green) all dates during the displayed time period that contain recovery points for that backup source.
- Select the calendar date for the backup image you want to export.
The corresponding recovery points for that date are displayed, along with the time of the backup, the type of backup that was performed, and the name of the backup.
- Select a recovery point that you want to export.
The corresponding backup content (including any applications) for that recovery point is displayed.
- Select the destination. You can either specify a location or browse to the location where the copy of your selected recovery point will be stored. If necessary, enter the User name and Password.
Note: Make sure you select a location that has sufficient free space available to hold the entire VHD.
- Set the level of compression to "No Compression".
No compression will be performed. Files will be pure VHD format. This option has the lowest CPU usage (fastest speed), but also has the highest disk space usage for your backup image be performed for VHD files.
A status notification window appears and the copy process for the selected recovery point type will be launched immediately.
The recovery point image will be copied from the backup source to the export destination..
"VStore\S0000000001"
For example, if your machine name is "Department_A" and you exported the recovery point (backup) to "E:\export_vhd\" you would navigate to:
E:\export_vhd\Department_A\VStore\S0000000001
Each of these files correspond to an actual physical disk on the source machine. After renaming these files, you can then use them as regular VHD files.